Tuesday, October 28, 2008
The 8mm Ethos Faces Dark Skies
 “Astronomy is a game for the patient.” How well I know the truth of that maxim. After 43 years in this avocation, I know all too well that it's just when the brass ring finally seems in reach that you get skunked. Bright blue skies and chirping birds tempt and tantalize and then morph into dark clouds and croaking frogs. That was the way it was a few days before I planned to head to the Chiefland Astronomy Village.
 The weather along our often cloud-shrouded Gulf Coast had been lovely. Crisp. Almost cool. In October, for gosh sakes. Then, just before I was to head south to the storied CAV, the forecast icons on wunderground.com’s page began to change from happy little Suns and Moons to nasty old clouds.
Which was just what I didn’t need. After a punishing summer and fall at work, I was ready for a break, and the (new) Chiefland Star Party seemed the perfect place to get one. If you’ve been hiding under a rock the last decade or so, the Chiefland Star Party is a great big do under dark skies near the little Florida town of Chiefland. It's an event that has in the past attracted upwards of 300 deep sky-crazed amateur astronomers. Unfortunately, this much-loved venue had rapidly outgrown its facilities. There was no longer enough room for talks, vendors, porta-potties, or telescopes. For that reason, the CSP took a couple of years off.
For a while it appeared that “couple of years” might become “forever.” But the CSP was just too good to let it ride off into the Sunset, and it was to be back this fall with plenty of electricity, a more enclosed area for vendors, a better place to hold talks (than the old open-air pavilion) and, most of all, a new and much larger observing field. I was counting the days to 24 October and the beginning of Chiefland 2008, especially since I had an agenda.
 |
| Tom Clark's shop, the Beast's dome, and lots of clouds. |
Suddenly, it looked as if that might not happen, at least not in the limited amount of time I’d be Down Chiefland Way. Due to my typically crazy schedule, I planned to arrive on the Wednesday prior to the star party (I am a Chiefland club member, so that would be permissible) and stay through only the first weekend of the week-long event.
When I went to bed Tuesday night, it wasn’t looking good. “Partly cloudy tonight” forecasts had been modified to “GOOD chance of thunderstorms all evening” for two of the four nights I would be in onsite. Nevertheless, the next morning I packed the Toyota and headed south. I’ve always had a great time at the CAV—rain or shine.
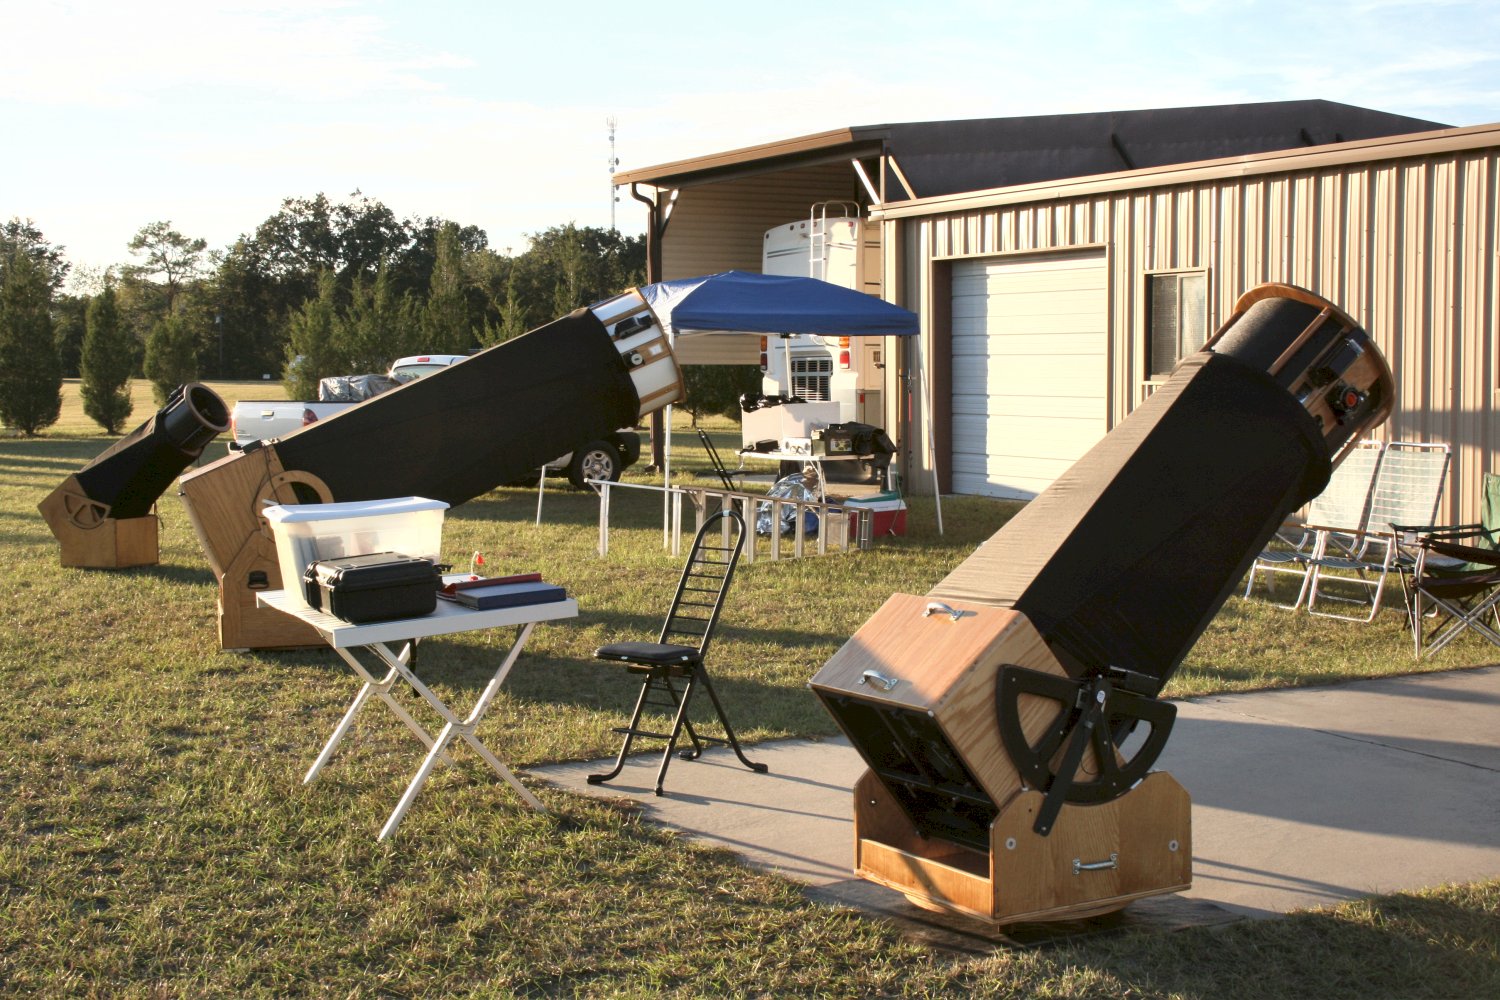
What did I take with me in addition to my two pretty new eyepieces? The telescope would be my time honored 12.5-inch truss tube Dobsonian "Old Betsy," who’s proved her mettle over 15 observing seasons. Why her instead of one of my CATs? I love my SCTs, sure, but nothing makes for a more impressive visual experience than the wide fields of a fast (Betsy's an f/4.8) Newtonian. I will also admit to y’all that after working on my forthcoming book, Choosing and Using a New CAT (November), for nearly two years I was ready for a short break from SCTs, much as I love ‘em.
 |
| Tom's "Mini-Beast." |
As the afternoon wore on and I got closer to my destination, I did begin to notice an increasing number of fluffy-white members of the cloud tribe. These were still relatively small and few, though, and I reassured myself they were likely just “a few afternoon clouds off the Gulf.” By the time I’d checked into the Chiefland Holiday Inn Express (my usual campsite), and headed out to the CAV, though, the sky was degrading rapidly and there was now a feel in the air that hinted bad weather was on the way. The only question was "when."
Otherwise? Quite a few folks were on the old "club" field already, and it was obvious from the number of vehicles on the official star party site just to the west that the revived CSP was going to be a big one this year. I began to set up in my usual location on the club field, opposite the picnic pavilions and just down from the Clubhouse, which was the spot my friend Pat Rochford and I had used for years. As soon as he saw me on the field, however, my old buddy Tom Clark (of Tectron Telescopes and Amateur Astronomy Magazine fame), roared over on his golf cart and convinced me to move to right outside his shop and close to the dome of the 42-inch Beast. We—me, fellow astro-writer Steve Coe and a couple of other friends—would have a mini-star party of our own right in the Clarks' "backyard."
 |
| And still more clouds. |
Tom and I unlimbered his fantastic 24-inch f/4.5, “Mini-Beast,” inserted the 13 Ethos, and got to work. Just as twilight ended, we thought to take a look at M22, which would soon be too low to fool with. Tom centered the big Sagittarius glob, and then squawked. Earlier, I thought I’d detected a little skepticism about the Ethoses from this Dobsonian guru, but it was clear ol’ T.C. was liking what he was seeing.
When I pressed my eye to the 13, I was ready to be impressed, but not nearly knocked off the ladder as I was. What was before me (that seems a more apt way of describing the Ethos experience than “in the eyepiece”) was an enormous globe of tiny, tiny stars. The big old grandpappy glob literally filled that enormous field. Again, as I have said before to all who will listen, it was not just the big field that was so amazing. Oh, that was part of it, but what was CRAZY was how sharp the image was. And how high the contrast was. With M22 not much above 25 degrees, I expected mushiness, but that was most assuredly not what I got. It was crisp, it was beautiful, and the stars were deadly-sharp pinpoints despite their low-altitude.
I was, frankly, also interested to see what the Ethos would be like in a fast(er) scope like this f/4.5. As you may know, not even Nagler and Ethos eyepieces will do anything to counteract coma. To “fix” this problem of faster Newtonians, to get them edge-stars back to being pinpoints instead of comets, you need a TeleVue Paracorr (or other coma corrector). Which we didn’t use.
I have heard some comments that coma seems worse with the Ethoses than with the Naglers, since the field is significantly larger. My verdict? That may be the case, but I did not find the effect pronounced or disturbing in this f/4.5. In fact, I didn’t notice much coma at all the whole time we was admiring M22. I just drank it in. When I did think to worry about the field edge, yes, it was there. Is the coma displayed in the 13 Ethos more obvious than that in a 13mm Nagler due to the 100 degrees of AFOV? Perhaps a little bit for some folks, but I didn’t find the overall coma level in the 13E more troubling than it was in Tom’s 13mm Nagler.
 |
| The good, old Holiday Inn Express in its salad days. |
Could I still be happy with a 13 Nagler? Sure. I guess. The Nag’s a fine eyepiece, but it would be a long time before I would be able get those mind-blowing Ethos visions outa my mind and be able to truly love a Nagler again. It wasn’t just that way with magnificent M22, either. One showpiece after another was as beautiful as the last in the 13: M13, M92, M17 and on and on.
But that was the 13mm, and I’m sure y’all are tired of hearing me gush about it. What about the 8-mm? I had to wait to find out. My first evening at Chiefland started with a depressing number of clouds in the sky, segued into a truly inspirational sky tour with Mini-Beast and the 13mm, and descended into an unbroken morass of cloudy skies as the promised storm front began to push in around midnight. Didn’t I use the 8mm at all? I did, but poor seeing ahead of the storm did not allow it to shine in the 24-inch or in my 12.5-inch. No, I’d wait for good weather before seriously putting it through its paces. Surely I’d have the chance; I’d be at the site until the following Sunday. For Unk it was back to the Holiday Inn for whiskey, those wacky UFO Hunters, and hopes for better skies Thursday night.
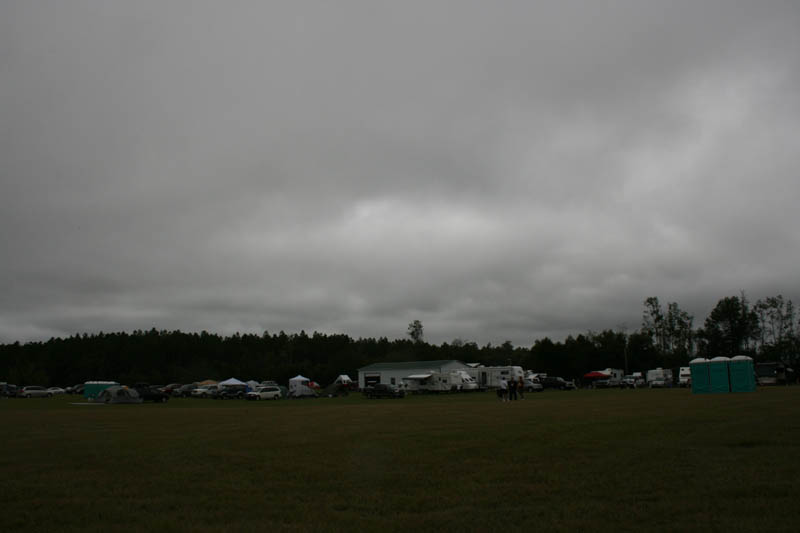 |
| The "New Field," the star party, and still more clouds. |
As we went from clouds late Wednesday night to pretty-much torrential rain early Thursday morning, to leaden skies and occasional rain Thursday night, to more of the same all day Friday and Friday night, I admit I did begin to wonder whether I would get to try the 8mm at all this trip. The weekend was here, and other than those few hours Wednesday night I hadn't seen a blessed thing.
What did I do while waiting on a predicted front passage that seemed to keep being delayed? I spent quite a few hours sitting in Tom's shop shooting the breeze with him, Jeannie, and Steve Coe. Friday afternoon, Steve and I enjoyed an hour or two in Chiefland's one and only steak house, Deke's thanks to Amateur Astronomy Magazine's new editor's, Charlie Warren's, largesse, eating the insanely cheap and good fare and talking about the current state of the amateur astronomy biz. After a nice thick, juicy ribeye with all the fixings, I was definitely in a better mood no matter how the sky looked.
 |
| The motel parking lot was on its way to becoming a lake. |
After spending the first part of Friday night sitting in Tom's shop twiddling my thumbs and sticking my head out the door frequently to look at the sky, I thought I had begun to notice a change in the weather. Ol’ cockeyed optimist me then predicted “some viewing” Friday evening, but I was proven badly wrong and had to endure some good-natured ribbing along the lines of, “You brought two Ethoses with ya? We know what attracted the clouds, then!" The only astronomy gear I tested Friday night was my new Astrogizmos red/white LED flashlight, which helped me find my way back to the Toyota in the dark as the rain began to fall. Again.
How about the actual, official Chiefland Star Party? I was registered, but did not spend a lot of time over there. I was having too great a time with my buddies at the Clarks’ and the rain and drizzle did not encourage tramping across the big New Field, anyway. I did note on my couple of trips that-a-way that the good folk there seemed happy—well, as happy as amateur astronomers get under cloudy skies.
The event appeared well-organized, and there were some welcome additions this year, including the presence of “Micki’s Kitchen,” the catering outfit that has been selling food at the Winter Star Party for a while. Jeannie Clark and I hoofed it over there one cloudy night in hopes of getting some of their famed chocolate brownies, but wouldn't you know it, they were sold out.
The ugly skies appeared to be keeping star party attendance down on Friday, but the large field had begun to fill on Saturday morning as more attendees rolled-in with the promise of clear weather. The weather reports were finally offering a near certainty for clear skies sometime Saturday night.
Yes, it appeared the heavens would finally open up Saturday night, if maybe not as quickly as we’d hoped. The cold front did not begin to move through in earnest until about 10 pm, but when it did, it did, and scopes were quickly uncovered both in our area, the Clarks’ backyard and the club field, and on the star party observing field itself.
Yes, the cover was finally off the ol’ Dobbie again, the Sky Commander was aligned, and I was ready to see what my other expensive glass could do. What to look at? With the sky not completely dark and a few clouds still hanging-in to the south and west, I turned to M2, the great globular cluster in Aquarius. What did I think? Beautiful in the 8mm. Just be-yoo-tiful. Oh, maybe not quite as cool as M22 had been in the 13 Ethos the previous evening, but, then, M2 is not the glob M22 is.
 |
| Micki's Kitchen. |
Is the 8mm perfect, then? No. No eyepiece is. Each is a compromise and the 8 Ethos (like the 13mm) is no different. Its faults? I had to look long and hard to find something to downcheck it on. I certainly didn’t notice any astigmatism. Nor could I detect any modicum of barrel distortion or “pincushioning” as I cruised rich Milky Way star fields. The only nasty negativism of note is that it is my impression than both Ethoses are prone to a bit more “blackout” effects than some of the Naglers. Don’t hold your eye in the right spot when viewing, and you do notice dark patches in the field, especially with a bright background.
In part this “problem” may be due in part to the fact that the Ethoses offer more eye relief, about 15-mm, than most ultrawides. That makes it—for me anyway—a little harder to position my eye properly. I did find leaving the eyeguard/cup up helped me get my eye in the right spot. I don’t normally use eye cups on eyepieces, but using one on the Ethos was not a problem. Even with it up, I could easily take-in all of that great, huge porthole. Now, don’t get me wrong about this: blackout is not a major problem with these oculars. Certainly they demonstrate far less than something like, say, the 35mm Panoptic (still a fave of mine, nevertheless). It’s also been my observation that it takes me a while to “learn” to use an eyepiece, and that once I do, things like eye-positioning begin to come easily and naturally.
 |
| Lot's of folks rolled in for the star party. |
Wanting something a little prettier than the run-of-the-mill H400 galaxy, I punched NGC 7331, “Andromeda Junior,” into the Sky Commander. Not only was the main galaxy bright and detailed, the Deer in the Deerlick (Ask me what Steve Coe’s new nickname for this one is some time!), the little companion galaxies nearby, were as evident as I’ve ever seen them in Betsy.
Swinging over to M74, I was surprised to see this sometimes difficult spiral’s arms standing out like sore thumbs. I don’t think I’ve had as good a view of this challenging face-on spiral in the 12.5-inch since one special night at the Deep South Regional Star Gaze nearly 15 years ago. Heck, I didn’t think my eyes were still good enough to see something like this. What else?
M31 was riding high, why not? 8mm may sound like a lot of magnification to use on this elephant of a galaxy, but it really is not, not if you want details instead of just the big picture. As with M74, I saw more of M31 than I’d seen in a long time. I don’t know I’ve ever had as good a view of this monster with any scope. Start with the dark lanes. Two were starkly visible. The satellite galaxies, M32 and M110? M32 nearly ruined my night vision. M110 was large—huge—and I seemed to see some sort of fleeting detail near its core. Speaking of galactic nuclei, M31’s core on this evening in the 8 was not merely “star-like,” it was a tiny blazing pinpoint.
I also noticed that something I have had trouble with over the years, the galaxy’s enormous star cloud, NGC 206. It was not merely “suspected” or “visible,” it was bright and easy. My only regret is that I didn’t spend some time hunting down some of M31’s horde of globular clusters when I was in the neighborhood. Next time.
 |
| Old Betsy. |
As often happens—to hapless me, anyway—the best skies came on the last night (for me) of the star party. Sunday morning I had to drive back home to Chaos Manor South where stacks of ungraded student papers awaited my attention. Reluctantly, I Desert-Stormed Betsy at about 1:30 in the am. Turned out I could have pressed on a while longer. When I got back to the motel, I found I just couldn’t sleep. My mind was too focused on the glories I’d seen, on the great expanses of The Andromeda Nebula I’d wandered across. Me and my Ethos.
Addendum...
Yes, over a decade later the TeleVues are still wonderful eyepieces. Would I buy another one, though? Probably not. Not long after the coming of the Ethoses, Explore Scientific debuted a line of 100-degree oculars. Are they as good as the Ethoses? In my considered judgment, no, not quite. But it is doubtful my aging eyes can tell the difference. And for those of us on semi-fixed incomes, the fact the ES oculars go for about half the price of the Ethoses has to be a consideration.
When I first started doing the Chiefland Star Party and the Spring Picnic not long after the turn of the century, I thought the CSP was destined to become "Texas Star Party East." 'Twas not to be. After going strong for about five years with the big fall star party and the almost as well-attended Spring Picnic, it faltered, becoming an on again/off again thing. Why? Maybe it was too successful. So many people were beginning to show up that the facilities, such as they were, were being stressed. What's wonderful for a small event or a monthly club gathering--a club house with two bathrooms, a covered pavilion, and electrical service suitable for a few RVs--just wasn't enough when the attendance boomed into the hundreds.
Also, as the second decade of the new century came in, many of the original Chiefland group who were the driving force behind the star party were no longer with us. Tom and Jeanie Clark retired to the southwest, Billy and Alice had passed away, and many others became less active and rarely present at the CAV. Yes, some new people stepped up to the plate, and for a while there was a revived star party with some new facilities and a spacious new observing field. It never really seemed to jell, however.
Finally, the weather just isn't what it used to be. Even the summers used to offer clear nights in Chiefland. That's now rare to the point of extinction. And conditions aren't, in my opinion, as good as they were ten years ago in the other seasons. A recent Winter Star Party was held at the CAV under resolutely cloudy skies.
One thing? What began at this star party. I suspect one reason this article has always been a favorite of mine is that this marks the real beginning of the Herschel Project. Ostensibly, it began here, but in retrospect, these nights under the CAV skies are what planted the seed of the that monster undertaking.
Sunday, October 19, 2008
The Laser and Laptop Wars: Star Party Etiquette for Modern Times
 Until just a little while ago, formulating and enforcing light rules at the average star party was a pretty easy thing to do. You made sure everybody understood and adhered to a simple stricture: no white light. Flashlights had to be covered with red cellophane, car interior lights had to be disabled if vehicles were allowed on the field and would be opened after twilight, and trunk lights had to be disconnected as well if the jalopy’s trunk were gone into before sunrise (where the hail are them Jack Links, Clem?) Oh, there was always something to be dealt with—some joker cooking a burger on the field with a Coleman camp stove (which can emit a surprising amount of light), blinding everybody in a 10-meter radius and, adding insult to injury, not sharing them good smelling sliders—but the basic Rules and how to adhere to ‘em was clear.
The simple life for star party attendees and organizers began to change as the last century ran out with the introduction of cars that sported “running” lights. What that basically meant was that the vehicle had an extra set of headlights that were often automatically controlled, coming on when the vehicle was started. On many newer vehicles there wasn’t even an easy way to disable this “feature.” Oh, there were some tricks, like putting the vehicle in drive with the emergency brake engaged one “click,” but all too many people were not able to do that or similar workarounds successfully, and the result was star parties that had not just allowed vehicles on the field, but had allowed them to be driven off via parking lights (sometimes during specified “windows” during the evening), discontinued this practice. Not that that has always helped. Almost every star party I’ve been to of late where cars are parked on the field has featured some goober creeping into his/her vehicle to get warm, cranking the engine to get the heater going, and illuminating scores of hard core imagers and deep sky observers with the equivalent of a magnesium flare.
The above is pure thoughtlessness, sure, but some folks just don’t get it; they are focused on what they want, and the possible results of their foolishness for their fellow observers never registers. One dude, for example, nearly asphyxiated me and the folks on my end of the field when he decided to hole up in the car and warm up. I will say he was reasonably careful light-rules-wise. Oh, there was some flashing of parking lights and interior lights, but only for two or three minutes. Then, however, this gomer let his engine idle for half an hour till his toes was good and toasty warm. Naturally, his exhaust soon covered the entire field in a noxious blanket that didn’t do any good for optics--much less lungs. We was all about to die, till Unk, who’s not usually rude, but ain’t no shrinking violet in these situations, either, Had Enough.
I went, tapped on this character’s window, and asked “Do you know what you are doing to us with your exhaust?” Naturally I was met with a surprised “Moi?” The guy did shut her down, but I couldn’t believe he hadn’t given the rest of us an instant’s consideration. I did have the satisfaction of hearing him, once he emerged from his warm cocoon, lapse into a coughing fit bad enough to make us wonder if he’d hacked up a lung in the carbon monoxide atmosphere. The meaning of this parable? The secret to a good star party experience for everybody, not just yourself, is to think before you do something silly (or otherwise) that is gonna make things less fun for your fellows.
I went, tapped on this character’s window, and asked “Do you know what you are doing to us with your exhaust?” Naturally I was met with a surprised “Moi?” The guy did shut her down, but I couldn’t believe he hadn’t given the rest of us an instant’s consideration. I did have the satisfaction of hearing him, once he emerged from his warm cocoon, lapse into a coughing fit bad enough to make us wonder if he’d hacked up a lung in the carbon monoxide atmosphere. The meaning of this parable? The secret to a good star party experience for everybody, not just yourself, is to think before you do something silly (or otherwise) that is gonna make things less fun for your fellows.
Not that folks don’t sometimes go a little overboard in the other direction concerning vehicles and their lights. At a star party I attended last year, I left my vehicle out on the access road. I wanted to be able to make a quick getaway back to the motel before dawn if the weather, which didn’t look promising, took a turn for the worse. Sure enough, that is just what happened. I gave it a couple of hours after we was totally socked in, but when mama and daddy clouds began giving birth to healthy looking baby clouds, me and my buddy Pat lit out. Yeah, I’ll admit we did engage the headlights before we was in the next county, but, again, we was completely clouded-out.
As you might have guessed, we were called down by the powers that be the next morning: “Did y’all drive off the field with your headlights on?” Why no, we didn’t drive off the field, and it was cloudy anyway. Sheesh! Along the same lines, I’ve got tired of the entire field lapsing into screams of “Douse that &*^%*&! light.” When Beaudreaux opens a lighted trunk by mistake. Don’t get me wrong: I think light rules should be enforced strictly (and kindly), but let star party staff do it. Most of us are more distracted by the howls of dismay than we are by Bunny Rabbit’s trunk or interior light. Above all, use commonsense. If it’s cloudy, been cloudy, and will be cloudy, what is it gonna hurt for somebody to turn on a light?
At least it’s easy to decide somebody’s doing a Bad Thing when they show a white light on the field. What makes light rules enforcement tough these days is the electronic marvels that are gracin’ every star party in creation. Mainly laptop computer screens and green lasers, though there is a host of other devices which, in the manner of many modern things, feature bright color LCD displays: cellphones, Palm Pilots, iPods, radios—hell, I wouldn’t be surprised to find the Chinese putting high resolution video screens on bottle openers. Is the screen red? Is it red enough? Can a green laser be used, even briefly as a finder on a telescope? Do any of these things even “belong” at big, organized dark-site events? Star party organizers have to find ways to deal with these artifacts of Modern Times without offending that (large) part of their audience who wants to use ‘em while keeping these folks from offending that other large part of their audience who wants the field absolutely dark—and sometimes is philosophically opposed to the gadgetization of amateur astronomy.
There is no doubt at all the most serious concern at today’s star party is the laptop computer. The displays on these things are bigger than ever and brighter than ever. Heck, these things light up the observing field with more ease than Rod’s first TV, a black-and-white Admiral CRT monster, lit up his living room. For a long stretch, all through the 1990s, laptops were not a “problem” at star parties. Mainly because they were too expensive for the run-of-the-mill amateur astronomer to think about subjecting to a dew soaked observing field. That began to change with the death of film. Astrophotographers were ponying up three or four grand for a CCD camera, and had no choice but to give up another couple or so for a laptop if’n they wanted to image from a dark site instead o’ the damned backyard. As more imagers turned from film to silicon, slowly, ever so slowly, laptop screens began to multiply on observing fields. With the new century, the Laptop Problem became a lot worse. Prices plummeted, go-to scopes proliferated, and many of the folks totin’ them LX200s and NexStars wanted to send ‘em on slews with the aid of TheSky or Cartes du Ciel.
Problem was, they was killing us—our dark adaptation, anyway. Typically, Mr. CCDer or Miss go-toer would select a program’s “night vision” setting to turn the display a supposedly night-friendly red, and think nothing more of it. Truth was, this red display was affecting everybody in the immediate area—anybody who had the misfortune to glance the computer’s way. First of all, the night vision modes of most software are neither red enough nor dim enough to help much. Computer displays need to have their brightness reduced almost to a minimum; not just turned red—bright red light is just as harmful as bright white light. Unfortunately, many laptops then and now cannot be dimmed sufficiently to both preserve night vision and remain legible. Also, most Windows night-vision settings cannot turn everything red. Something—like the task bar or the screen borders--is almost always left in normal colors no matter which Windows “theme” is applied.
Solution to laptop light pollution? Some star parties have toyed with the idea of “ghettoization.” Make anybody who’s gonna use a PC set up on a particular and designated portion of the field. This may have worked at some events, but I don’t like the idea. Not only does this have the potential for making computer users feel like pariahs (and you do want ALL your attendees back next year, right?), it’s becoming an impractical solution since more and more amateurs want the good things a computer can bring to the observing field—not just imagers and go-toers anymore; many, many Dob users are now sporting laptops too.
The real solution is two-fold. Firstly, their users must understand that most laptop displays will be unworkable on a dark observing field no matter how much they are dimmed or what’s done to their color scheme. What works and works well is a red filter used in conjunction with a program’s night setting. Some laptop wielders are covering their screens with a red film, Rubylith, a durable and very red transparency originally used in the graphic arts industry. This inexpensive material is reasonably durable and quite effective. Me? I ran across a little product called the Sightsaver, which has worked very well. It is a piece of red Plexiglas in a frame that slips over the PC’s display, effectively reddening it, dimming it, and preventing light leaks via foam strips positioned around its edges. Many astro-dealers are selling pieces of red Plexiglas with frames and without that will allow laptop users to read their displays with ease and keep their fellow star party attendees from forming a mob of maddened torch-bearing villagers straight out of Frankenstein (“I tell you, he’s doing things Man Was Not Meant To Do!”).
Red filters work, but some of us are taking an extra step and placing the laptop in a small enclosure of some kind. Yeah, a red filtered display will not harm you or your buddies’ dark adaptation if it is adjusted correctly, but some folks get right unhappy if there is a laptop a few feet away staring them in the face, even if it is not really doing anything to bother their night vision. Some guys ‘n gals are just bothered by what they see as an intrusion into the peaceful natural setting of a star party and into their enjoyment of it. I understand this mindset and even agree with it to some extent (e’en if, strangely, these are sometimes the same folks who think nothing of firing up a stogie and fumigating the whole field). How to keep everybody happy? Fabricate a little house for Miss Laptop. The one in the image above took only a few dollars and a few minutes to make and is very effective.
The most important consideration is using a material that is light but waterproof. I tried foamcore posterboard from an office store first. This worked, but rising humidity tended to make the “walls” of my enclosure bow-in and deform even though I’d sealed ‘em with some spray stuff I got from a craft store.
I was thinking over the problem one afternoon when Joe Spit the Ragman, who was running for city councilman, delivered a yard sign in hopes we’d display it on Chaos Manor South’s front lawn. I was not overly impressed as to the viability of Ol’ Joe’s candidacy, but I liked the material his sign was made from, a corrugated vinyl. A little mousing around on the ‘Web turned up a supplier of sheets of this stuff, which is available in colors, and which costs less than 20 bucks for 10 sheets, enough to make one for you and one for Beaudreaux and his Cousins, too.
A few pieces of Velcro, some tape, and a plastic garbage bag, and I was in bidness. Why the garbage bag? I attached that to the open end of the enclosure with Velcro so the computer can be hidden from view when not in use so as not to offend any Luddites with the sight of—shudder—Microsoft Windows. In addition to preserving the sensibilities of my fellow partiers, the enclosure keeps dew off the computer and any small items I place in there with it. So the Laptop Wars are finally over? I suspect not. No matter what I or anybody else says, some folks won’t adequately shield their computers, and other folks will still object to the presence of laptops on the field no matter how well shielded they are.
Let us now visit the next arena in the high-tech conflict: lasers. As was the case with laptops, the greenies had been around for a while before they began to make their impact felt on the observing field. In case you’ve been hiding in a cave the last decade, I’m a-talkin’ about laser pointers that project a green beam rather than a red one. Wut good’s they-at? This more intense beam will create a visible “light saber” effect in dark skies under almost any conditions. The utility of these devices for educators was immediately obvious. If you’ve tried to show a group of students Zuben Elgenubi, for example, you understand what a godsend a “sky pointer” can be: “No, not that one, the brighter one just to the left of that other one.”
Some relatively wealthy university astronomy/physics departments were using green lasers a decade or so ago with their “descriptive”/introductory astronomy courses, but most of us had to wait for the price to come down. Which it did, suddenly and steeply, beginning three or four annums ago. All of a sudden any Bubba or Bubbette could have a green laser pointer for a hundred bucks—about half that now or even less. Since the light saber beams, especially those of the lower-powered el cheapos, show up best under dark skies, it seemed natural for the proud new owners to want to take them to the next star party to show off. Some enterprising souls also figgered-out that these things could make good finders. Place one in a set of 30mm finderscope rings, tape down the “on” switch and point your way to the objects of your desire. Before long greenie makers and astronomy merchants alike began selling lasers and mounts ‘specially for this purpose. It looked like lasers would be the next big thing at star parties. Till some of us said “whoa.”
As is the case with vehicle lights and laptops, there’s a radical opposition to lasers and a more reasoned one. The radical viewpoint offers fearsome scenarios of black helicopters that have been painted by Cousin Elmo’s green laser swooping down and packing off everybody at the Posum Holler Star Party for a nice vacation down to Gitmo. In truth, this is farfetched to put it mildly. Unless your site lies in the glide path of a nearby airport, the chance of anybody accidentally painting an aircraft with a green laser pointer is slim to none. The chance of anyone aboard an aircraft actually seeing said laser, identifying it as such, and being bothered by it is even less.
Then there’s the astrophotography angle. Supposedly, a green laser beam will ruin any long exposure image being taken anywhere on the field. While this seems plausible, kinda-sorta (the beams can be visible in a telescope; you can point a scope by observing the beam of a nearby handheld laser placed on the target), I have no evidence that this has ever actually happened. Unless you are using the latest powerhouse from them Kool Kats at Wicked Lasers, it is unlikely in my opinion. Not convinced? Stand a dozen yards off axis from the average laser, and its beam becomes far less impressive than it was when you were looking straight up it. I would also guess the beam would have to be held on target for an appreciable length of time even when the laser is positioned near a scope taking an image before it would register in the frame. Verdict? Unproven if conceivably possible under just the right circumstances.
So I’m all in favor of green lasers at star parties? Uh-uh. Nossir buddy. Oh, I have used them at star parties in the past, but only as part of a scheduled “sky tour” to be given by me (as a speaker) at a particular time (early) and in a particular part of the field (as far away from CCDers as possible). But, in general, I oppose ‘em. Why? Two reasons: the Pollution Factor and the Foolishness Factor. By “pollution,” I mean light pollution, but not in the sense that looking up at a laser beam will wreck your dark adaptation. What I mean is that you get three, or four, or five, or six green lasers moving around the sky and you get something that looks like Las Vegas’ violated skies at your formerly pristine site. I don’t think this is an improvement on the night sky, and can’t believe anyone would think it is.
Then there is the Foolishness Factor. If folks would use their lasers for their intended purposes, pointing out objects and pointing telescopes to objects, they would not be so consarned annoying. But one thing you can always depend on: put a greenie in the hands of a sizable percentage of folks and they will not be able to resist playing light saber games, swishing the damned thing around the sky constantly. Also, and almost unbelieveably, some worthies simply cannot keep their beams pointed at the sky. They just have to illuminate the treeline on the edge of the field, or, more disturbingly, and dangerously, accidentally (or not) get their lasers pointed at their fellow partiers. “Jus’ a joke on ol’ Bubba.”
Not much of a joke, Pinhead. Aside from at least a potential for injury if the beam strikes somebody in the eye, it is just plain childish and unfriendly. I haven’t seen somebody punched in the nose for playing these kinds of games, but I wouldn’t be surprised. Because of these very real and reasoned concerns about green lasers, most organized star parties have banned them. If you need a laser “fix,” wait till you’re observing alone or with a few local buddies—many smaller clubs still put up with them at their dark sites if they are used reasonably and carefully.
Now we come to the Palm computers, cellphones, iPods and other gadgets mentioned earlier. Yep, everyone of ‘em has a bright screen that becomes blindingly bright at a dark site. Rules concerning these are fairly straightforward—they are like flashlights or computer screens—no red means no good. The approach to making them star party friendly is the same as with laptops: red filters. Yes, I know Palm (and PPC) astronomy programs have “night vision” settings, but these are no more effective in my experience than those of laptop software. For example, the excellent program Astromist allows you to not just turn your Palm display red, but to dim it to an acceptable level.
Unfortunately, as with Windows, some elements of the screen are left white/color on many Palms. To fix, just get a small square of Rubylith and place it over the screen. Simple. Same goes for the cellphone and the iPod. The biggest problem these devices pose at star parties is not that it is difficult to make them dark sky friendly, but that people forget to. The cell or ‘Pod is so much a part of some folks’ life, I reckon, that they don’t imagine their use could disturb anybody anywhere. Obviously they can, and not just from a light pollution perspective—I won’t even go into the effect your loud cell conversation with Aunt Lulu about your digestive problems has on my contemplation of the Realm of the Galaxies.
You know, when you really get down to it, not much has changed in the star party game despite the coming of computers and lasers and other tech gimcracks. Preserving the dark sky experience is still about being considerate of your fellow observers. Yeah, I know many of you are, like me, into go-to and CCD and every technological advance you can haul onto a star party field without being forced to drag along your own nuclear reactor to power everything. Remember, though, not everybody wants to enjoy the sky that way. Some folks just want the sky, just with their eyes and nothing more than a pair of binoculars or a Dob inbetween.
I think it would do every astro-tech maven good to do as I sometimes do: leave all that junk behind and grab a copy of Sky Atlas 2000 and a push-to Dob once in a while. Consideration goes both ways, of course. If you are Just Right Put Out with the imagers and the go-toers that show up at the star party in greater and greater numbers, stop and ask yourself whether it’s really the light generated by the gear (or the grinding of slewing motors) that’s bothering you, or it’s really that you simply don’t like this stuff, that the presence of a PC on an observing field seems wrong in the very depths of your soul.
Luckily, almost every single amateur astronomer I have met over the last 40 plus years has been smart and nice. There have been a few exceptions—there are always a few casualties in any war, and we all make mistakes once in a while and fools of ourselves on occasion--but my guess is that we’ll have this latest round of technological advancement (if that is what it is) sorted out directly, and that we will be able to go back to enjoying the night sky and each other’s company as we always have.
Sunday, October 12, 2008
The Celestron SkyScout: Uncle Rod was Wrong
 Yeah, despite what you might think (or more likely what I might tell you), it happens. Unk is wrong, wrong, wrong. Now, some folks might say that that is not exactly an uncommon experience. I dunno about that but one thing I will say is that when I finally figger out I was in error. I will admit it. This entry constitutes my mea culpa concerning the SkyScout.
If you’ve been reading this blog for a while now, if you’ve been aboard for at least the last couple of years, you know there are times (a few) when Your Old Uncle does not positively gush over the latest glitzy piece of astro-gear. So it was a couple of years back when I offered my initial and uninformed opinion of Celestron’s latest fillip, the SkyScout. Oh, I admitted the concept was “interesting”: a little handheld camcorder-like “starfinder” that worked magic with a built-in GPS receiver, digital compass, accelerometers, and a computer brain. My uniformed conclusion, though? This thing, no matter what kind of technological advance it represented, would be of limited interest to amateur astronomers.
What, after all, was it good for? It might be able to identify naked eye objects or lead you to them via a zero-power sighting window. B-U-T… “If you already know the stars, what good is that? And if you don’t know ‘em, a paper planisphere and a red flashlight are one hell of a lot cheaper.” I also doubted whether the young-set would like this thing much. I predicted that, far from hooking 'em on the sky, the SkyScout would almost instantly lose its allure and chase ‘em back inside to the Playstation 3, sending Mummy’s and Daddy’s 400 pieces o’ eight down the ol’ tubes. Well, guess what? I was wrong. The SkyScout is not perfect, but it is amazing. And it’s actually useful for both amateurs and younguns.
How did I come to this conclusion? I got my hands on a SkyScout in the flesh and tried one rather than just speculating. My first hands-on with the ‘Scout came at a recent club star party. My buddy and long-time observing pal, George Byron, had brought one out and was kind enough to let me take it for a quick spin.
First impression? It’s bigger than it looks in the pictures. Yeah, it’s like a camcorder, but think “big, honking 1990s analog camcorder.” It’s not heavy, but it feels solid, and looks that way with its brushed chrome panels and rubber-armor fittings. The next thing I noted was not quite as impressive. The SkyScout’s display is a black-on-white LCD that’s illuminated a particularly deep shade of red—even redder than Celestron’s NexStar hand controller’s illumination. That’s good from a night-vision preserving perspective, but not so hot from a middle-aged-eyes perspective. I found I had to put on my dadgummed reading glasses to decipher the smallish letters or even to read the legends on the SkyScout’s buttons. Naturally, I then had to remove the spectacles to sight objects in the sky. Do note that my close-vision is bad enough that I can’t read the NexStar HC or even the green-illumined Sky Commander display either. Still, it would have been nice if the Big C had used bigger text.
Operationally? Once I figgered out what the hell I was doing without the benefit of instructions, I was good to go (the widget does have a “help” button, but I couldn’t find it in the dark). Basically, you do two things with the SkyScout: you identify stuff and you find stuff. Since my main interest, I suspected, would be identifying objects, I tried that first.
There are two ways to identify objects with the Scout: you can just mash the “Identify” button beneath the display, or you can use the scroll/selector button on the control panel’s left to get to “Identify” on the menu and select it. If the SkyScout is on anything but its main menu, you may find you need to use the “back” function the this control to get to the right place. Once there, or after pushing the “Identify” button, the display responds with “Sight object and press ‘Target.’” The ‘Target’ button referred to is conveniently placed on the upper housing, close to the rear peep sight window. "Hokay, let’s see if you know yer stuff, little gal,". I pointed the thing at Polaris.
Sighting naturally brings up the sight. The SkyScout’s zero power window is appropriately large—it’s more like using a Telrad than a b-b gun sight—and the surfaces are anti-reflection coated and red illuminated. In use, you put whatever you want to I.D. in the red-illuminated inner circle inscribed on the front window, taking care to line that up with the corresponding circle on the rear window. I haven’t measured how much sky these circles take in, but the whole window seems to encompass a couple of degrees and the inner circles ‘bout half that. With Polaris as near to the center of the sight as I could get it, I punched “Target.” A series of little illuminated arrow-heads positioned around the periphery of the front sight flashed, and I figgered that meant my choice had been registered. The ‘Scout, despite having built-in audio, didn’t beep at me or do nuttin’ else.
Retrieving my readers revealed the display was now sayin’ “Polaris” just as it should have. This is where things get a bit glitzy. You’ll find that for some I.D.ed objects (about 200) the word “audio” will also be displayed. Scroll to it and select it and, if you’ve got (the included) earphones connected, you’ll hear a nice description of the target that often includes its mythological/folklore background in addition to the “whats” and “how fars.”
The reading is done in a clear and professional (dare I say almost sexy?) voice by Sandy Wood of Stardate fame. "But won’t much of this info be superfluous or already known by experienced amateur astronomers?" Maybe. I picked up some interesting factoids and tidbits I’ll definitely remember. Don’t feel like listening to audio? The spiel can also be displayed in (small) text. Don’t care Pea Turkey about this sort of thing? Just the facts, m'am? Select “scientific data” from the display, and you’ll be given fairly extensive (text) information on your object: name, type (DSO type, binary star, etc.), distance in light-years, spectral type for stars, separation (for double stars) and more. I tried the identify function on several stars from horizon to horizon, and never once did the ‘Scout miss a beat.
Next up was “locate”—“go-to,” I guess. Punch the (yep) Locate button or select “Locate” from the main menu and the SkyScout guides you to the target. How? First you select what you want from one of several menus, deep sky objects, named stars, planets, etc. These objects are fairly well sorted in their databases and are not too hard to get to. The Herschel 400 (yep the ‘Scout’s got ‘em) are, for example, arranged in groups: “H1 – H20,” “H20-H40,” etc. Scrolling is required, but that is not too annoying. When you’ve got the target of choice selected, the ‘Scout informs you the targeting reticle is active.
With the reticle active, look through the sight and observe the illuminated arrowheads mentioned above. These will light up to direct you to your target. “Up” arrow illuminates, move up, “down” is lighted, move down. The SkyScout did not have any problems locating whatever I asked for, but my experience, and what I hear from other users, especially novice/casual astronomers, indicates Locate is a little harder to do than Identify. First of all, you need to take care to keep the front and rear sight circles lined up as you “slew” across the sky, and you need to position the device at arm’s length rather than pasting your peeper up against the little window. The position of your head also can make a difference. Accuracy? I found the SkyScout always placed what I wanted somewhere in the window, but being careful positioning my eye and the SkyScout itself made the difference between “somewhere there” and “right there in the middle.”
What else can the SkyScout do? Identifying and Locating are the main things but not the only things. One other function I found nice was that the SkyScout can “trace” constellation figures. Tell it to trace Cassiopeia, and the ‘Scout will land you on all the stars forming the Queen’s “W.” While the SkyScout, unlike Meade’s competing product, the MySky, is not exactly graphics heavy, it can at least display the constellation stick figures. Combine that with the trace function and I believe the little gadget might be a real help in learning the sky pictures.
That all? Not quite all. One of the most intriguing things you can do with the SkyScout is interface it to Celestron’s NexStar series of go-to scopes via an add-on kit called the SkyScout Connect ($99). “Connect” is a hardware interface to the Celestron controller that allows the user to send a scope on go-tos from a SkyScout. It also allows non-GPS-equipped scopes and mounts—like the ASGT series—to use the SkyScout’s built in GPS receiver during alignments. At this point, I haven’t quite wrapped my mind around what good this would do beyond the convenience of GPS, but look for a review soon; especially if I can cadge a review SkyScout Connect kit out of Celestron. How about GPS? Why haven’t I mentioned the ‘Scout’s GPS receiver? Simple: so far I’ve been jawboning about George’s SkyScout. When he handed his over to me, it was already aligned (or whatever you want to call it). To investigate GPS I had to wait to get my own SkyScout.
My own SkyScout? That was frankly something I had avoided. Laying out nearly 400 shekels for this thing, that is. Oh, I supposed I could have whined to Celestron for a review unit, but I was a little reluctant to expose their expensive toy to my clumsiness or to put it in the hands of my undergraduate astronomy students. What made me finally buy one? The price drop. As I said in my initial blog entry, I could at least conceive of handing over the cash for a SkyScout at the 200-dollar level. So, when the price quickly came down to that figger (in about two years), I grumbled a bit but ordered one up from the fine folks at Astronomics. I thought, if nothing else, this was something my students would enjoy playing with (like our green laser), even if I couldn’t find much useful to do with it.
In a remarkably short time, a little box was on Chaos Manor South’s front porch. After I ripped that sucker open, what was revealed was, in addition to the SkyScout, a CD containing a firmware updater/flasher program and the manual, a USB cable, a nice little nylon camera-style case, a wrist strap for the SS, a shoulder strap for the Case, a pair of “earbud” earphones, and a quick setup guide.
First order of bidness is installing batteries. The ‘Scout uses two AAs that are not just inserted in the battery case, but are first slipped into little cylindrical magnetic shields (to protect the SkyScout’s compass from electromagnetic interference that might be generated by some batteries). Somewhat annoyingly, it takes a screwdriver to open the battery chamber. My usual workaround for battery cases secured by screws, a dime, won’t work, since the retaining screw is somewhat recessed. Luckily, and contrary to what you may have heard, I didn’t find the SkyScout overly hard on batteries, so you shouldn’t be fumbling with the battery door too often.
With my SkyScout able to be powered up, the next item on the agenda, since it was still a bright and sunny afternoon, was updating the firmware. That is done by installing the aforementioned flash program on a PC. My “astronomy laptop” is still running Windows XP and I haven’t tried to install Celestron's program on my Vista desktop, so I can’t report on any issues there. I can tell you that currently this software is for Windows only—no Apple support.
Once the application was loaded off’n the CD (via a menu that allows you to do other things, too, like look at the manual, register your SkyScout, etc.) operation was simple. If you’ve done something similar like updating a go-to HC, this will be Duck Soup. Click the “Check for Updates” button on the graphic of a SkyScout the program displays, and it will first check for an update for itself. My loader program was out-of-date, so I allowed it to download and install the new version. That done, I shut down the program and connected the SkyScout via its USB cable. There’re two receptacles on the “eye end” of the ‘Scout; one for earphones and one for USB, that are normally left covered by little rubber doors.
Plugging-in the ‘Scout caused the normal Windows driver loading sequence to initiate. The drivers installed successfully, and while the manual includes instructions for loading ‘em, most Windows users know the driver-load routine by rote and won’t need to reference the manual on the CD. Once I’d got the drivers installed, I brought the updater back up. When I clicked the “check” button again, the program informed me my SkyScout’s firmware did need updating to the current rev, v1.30.
What would that do for me? It would add 36,000 stars, the NGC catalog, the Herschel 400, and the Caldwell catalog. Now, most of these new objects would not be visible through the ‘Scout’s “Telrad window,” but if I did rig the thing up to a scope with SkyScout Connect, they would be welcome. I had also heard that the update cleaned up a few problems with the ‘Scout’s system software. Download and installation took maybe 10 minutes. Amusingly, if you’ve got the Microsoft Mike and Mary voices installed, the updater talks to you in the same voice as NexRemote.
Despite it being daylight in my urban neighborhood, I couldn’t resist firing up the ‘Scout and seeing what she’d do in the daytime. Two of the most frequent complaints I’ve heard about the device concern its ability (or inability) to get GPS fixes and its susceptibility to magnetic interference from large metal objects and power lines (indicated by a magnet icon on the display). I for sure found the former to be the case from Chaos Manor South’s front porch.
Oh, she tried to get a fix, she really did, but my very restricted view of the sky (lotsa oaks, and all the old 2-story houses crowded together) made that more or less impossible. Yes, if I punched “retry” after a failed fix, the SkyScout would claim she got one, but the resulting position data would place me somewhere near Rwanda. I didn’t get all upset, since my little Cobra handheld GPS has a similar lack of success in the yard. Luckily, you can input a site’s time and location data manually. While the unit appears to retain location, you must re-input time/UTC offset after every power cycle (which can be a bit of a bother, see below).
With ‘Scout positioned at the right lat and lon, I tried a few go-tos. Given the relative placement of bright stars indicated by Cartes du Ciel, the SkyScout placed me in approximately the right areas of the sky, it was obvious. Yeah, when I’d stand under the power lines in the front yard, the magnet icon would appear, but it didn’t seem to make much difference in the go-tos. However, nothing would tell the tale like a night under the stars. On this evening, my good buddy Pat and I were planning to slide over to Pensacola to hear Doc Clay Sherrod speak to the Escambia Amateur Astronomers’ Association (look for a full report in an upcoming blog entry), and I figgered that when we got back to Pat’s I’d try out the ‘Scout in his big, open, back-forty.
I was a little concerned about the GPS receiver, yeah, but it turned out I need not have been. From the foot of the Rochfords’ pecan orchard, the SkyScout took a GPS fix in less than a minute, and a glance at the resulting data on the display showed I was at Pat’s Stargate Observatory not Kigali. Several on-off cycles demonstrated the receiver was reliable fix-wise. By-the-by, if you want to use the ‘Scout as a GPS receiver, you can push the “GPS” button on its side and see numbers, graphs, and SV info to your heart’s content. Verdict? The SkyScout’s GPS receiver is sufficient if not quite as “hot” as those in some modern handhelds. Since it’s relatively easy to input site data, this is not a major hindrance to using the device in areas where obstructions (especially to the south) can make it hard to receive SVs.
It would be nice if the unit would retain time/date for the “next time.” That would make startup quicker assuming you have not moved. As mentioned earlier, location is preserved, but you will have to re-enter time/date every time the SkyScout is turned on—which can be annoying if you let the unit power itself down frequently. While I didn’t think the SkyScout was that battery hungry, Celestron apparently thinks it is, as the unit will turn-off automatically after remaining idle for 5-minutes. When that happens, you’ll have to push the power button and allow the ‘Scout to get a new fix, or you’ll have to manually enter date/time/UTC offset again. Yes, the ‘Scout warns you it’s about to power off, but it would be nice if it would BEEP in addition to displaying a countdown on the screen.
Following the successful acquisition of a fix, I did some go-tos and some I.D.s to satisfy myself that my SkyScout worked as good as George’s had. Sure did. Two units ain’t much of a sample, but at least I was seeing some consistency in the fact that both SkyScouts had performed indistinguishably. One thing I did find annoying this evening was the sight’s illumination. It was bright enough that dimmer stars were overwhelmed. A little noggin scratching and ruminating and looking at the ‘Scout and I realized pushing the button with the “brightness” icon (right below the volume control button on the unit’s left rear) would fix that. Anyhoo, my SkyScout done good, just like George’s. But this good news about its performance still left one question unanswered. What is this thing good for, for amateurs or kids or anybody?
The first part of this question was answered in surprisingly short order. In addition to trying out the SkyScout, Pat and I were troubleshooting his balky set of Sky Commander digital setting circles. It was late, there was a lot of haze, some light pollution, and a fat first-quarter Moon was hanging in the sky like an overripe fruit. We usually like to use Fomalhaut as an alignment star this time of year. But which star was Fomal-whatsit? The haze, moon, and light pollution had dimmed everything, erased dimmer constellation members, and made it difficult to be sure which luminary was the normally prominent sparkler.
Out came the SkyScout. A mash of “Identify” and we were assured that that one was Fomalhaut. I run into these situations frequently, either when observing from light-polluted areas or when trying to get aligned before it’s good and dark (Kocab often skunks me into thinking it is Polaris). This is also a problem when I’m working outside with students, with some kid inevitably asking something like, “Uncle Rod, is that star part of Hercules?” and me having to respond with a lame, “I can’t see enough other stars to tell you.” I will also say no matter how well-versed you are about the sky, you may not be able to identify Zeta Ophiuchi, for example, at the drop of a hat. Which may throw a monkey wrench in your star-hopping. Sure, you could squint at an atlas or a PC screen, but it’s easier (and more fun) to use the SkyScout. Maybe no more justification is needed than that: using the SkyScout is fun.
How about the SkyScout as a learning/teaching tool? I haven’t tried mine with the kids yet, but I believe they are gonna love it. Certainly I’ve had enough reports from educators and amateurs to tell me I was wrong about the ‘Scout having limited appeal for the younguns. Surprisingly (to me) there seem to be sprouts, plenty of ‘em, who prefer the SkyScout to an Xbox 360. Go figger.
Celestron could help here by continuing to release add-on “guided tours” on inexpensive SD cards. Yep, there’s an SD card slot up front on the ‘Scout, and Celestron has a couple of cards out now, “Astronomy for Beginners” and “All About Stars.” I’ve heard particularly positive commends about “Beginners” from novices and younguns. Only bringdown? Apparently (I’ve been told so, anyway) Celestron is playing its cards close to its chest. It would be nice if a software utility were released to allow educators (or whomever) to program their own SD card tours, but for now C won’t say anything about programming the cards other than “PROPRIETARY!”
Yeah, there’ve been a few quibbles interspersed here and there, but as you can tell, my reaction to the SkyScout is overwhelmingly positive. Yes, I was wrong. If you are not a total curmudgeon (“I tell ya, sonny-boy, all we had in my day was a paper Edmunds Star and Satellite Finder planisphere and we was lucky to have that!”) and are the least bit intrigued by this device, get one. I suspect Celestron will introduce a “Super SkyScout” one of these days, and I would bet it will be more than 200 bucks—and I would also bet it won’t be much more funner, no matter how many new bells and whistles it has.
How about the similar Meade MySky? I’ve seen one in operation (briefly) and was impressed. I do understand it’s had some initial problems and growing pains, but I’d still like to try one. I made a rather oblique suggestion of that sort to a Meade rep, but he didn’t take the bait. Chances are they have other things on their minds at Big Blue at the moment. For now, I’d say either “wait and see” or “get the SkyScout.” And I most heartily tend to the latter. I cannot but believe you, like the formerly skeptical Unk, will at least be mucho impressed if not completely bowled over.
2020 Update
Alas, I turned out to have been right about the SkyScout after all. If it had appeared five years earlier, and the company had developed some more and more useful software for it, it could have been a big hit. Alas, it arrived on the cusp of the coming of the smart phone, which could do anything the Scout could do and do it better. I still have my SkyScout--somewhere--but still haven't been able to figure out something useful for it to do.
Sunday, October 05, 2008
Old 37 Under the Stars with a DSLR
 I was anxious to get my old friend, whose story I recounted here not long ago, out under the stars in hopes of finding out what she was made of. Would she be the astrograph of my hopes? Or would I need to think about that luscious new Orion MNT afterall?
 I thought you-all would like to hear the final results of my long, long ATM odyssey. There’s another reason I picked Ol’ 37 as the subject for this edition. After the firestorm of controversy generated by my last entry, “Ethos Mania,” I thought it would be nice to take off my flame-proof skivvies for a while. What else is in it for you? Even if you don’t care Pea Turkey about my homebrew rig, you may find the story of last night’s multiple imaging foul-ups…er… "instructive.”
Astrograph, eh? Why would I want to use something other than one of my beloved SCTs, anyhow? I’ve been imaging with my friendly CATs for years, but that doesn’t mean I use ‘em for everything or think they are perfect for everything. Let’s face it, 2000mm is a lot of focal length to deal with, and if, like me, you must use your scope in portable mode and are just naturally lazy about things like polar alignment (I sure am), cutting down them mms helps. A lot. Get down to about 800 – 900mm of focal length and deep sky snapshooting becomes much easier. It’s finally possible to get nice, round stars without winding up needing a hair transplant.
How do you get down to these short(er) f/ls with a Meade or Celestron? You use a focal reducer. Which I do almost always—both f/6.3s and f/3.3s as appropriate. Tain’t no such thing as a free lunch though. The reducers work pretty well for me. But I ain’t aiming to be no celestial Ansel Adams. As I’ve said plenty of times before, all I aspire to is snapshots, humble pix that document my travels across the deep, deep sky. My “Instamatic” astrophotos will never appear in the Gallery section of Sky and ‘Scope, and that is just OK with me. HOWSOMEEVER… Even given my modest expectations, I am not always thrilled with reducers.
The most aggravating thing about focal reducers and reducer/correctors is that they cause a vignetting-type gradient in images with all but the smallest of small-chip CCD cameras; especially if you are shooting from skies that ain’t perfect. This “porthole effect” can be removed with a good flat-field frame, but since I work with a portable scope, it’s not very convenient for me to do flat fields. To do ‘em, your scope must be perfectly focused, and the camera can’t be removed/moved from the time you do the flats until you are finished imaging.
That means leaving the focuser untouched run to run and arriving at the site well before sundown to do my T-shirt flats (shoot the sky at sundown with a “filter”made of T-shirt material over the scope’s end). Yeah, it’s possible to use light-boxes and other contraptions to do flats after dark when you can focus the scope on a convenient star, but that’s one more piece of gear to worry about and I am nearly overwhelmed in that regard already. That ain’t the only fly wigglin’ in the reducer ointment, neither. If there is an overly bright star in the field, the f/6.3 reducer/corrector, especially, tends to generate WEIRD-looking reflections. In fact, Bubba down the street got all het-up when he mistook one of these odd blobs for a saucerful of Little Gray Dudes from Zeta Reticuli II.
Sure I’ve got my small-aperture APOs for those times when, for one reason or anudder, I don’t want to use my SCTs (having to track across the Local Meridian to get a shot and chancing mirror flop being one). But it would on occasion be nice to have a little more aperture and image scale than these refractors provide. What to do?
First thing I thought about was the 6-inch f/9 Richey-Chrétien the boys n’ gals at Astronomics are preparing to sell. I also considered the aforementioned new Maksutov Newtonian from Orion, a 7-inch f/5.3. I like new gear, sure, but I’m awful cheap as well, and I wasn’t overly happy at the prospect of shelling out 1300 bucks for either scope. Also, in the case of the R/C, I’d be right back in reducer-town in order to make its f/9 optical train suitably fast (a dedicated reducer is also not yet available). At the time I was pondering these weighty issues, the 37-year-old scope was coming together, and I began to wonder whether it might serve as an alternative astrograph and save Unk a grand or more. This hope was one of the reasons I opted for a diffraction spike eliminating curved spider to hold up Ol’ 37’s secondary: If I want star spikes in an image I will put them there with Photoshop.
How did it work out? How did Ol’ 37 do as a picture taker? It wasn’t till last night that I was able to find out—sorta. Oh, I’d had a brief look at the Moon, Jupiter, and a few bright DSOs the evening after my good buddy Pat finished work on her, but cloudy nights and sea-trials onboard the U.S. Navy’s latest AEGIS destroyer, TRUXTON (a grand lady) meant I hadn’t touched the scope over the following month. The prospect of clear skies for this Saturday night induced me to enlist daughter Lizbeth’s help and start loading up the ton of gear required for an imagin’ run at the PSAS darksite. What did we cram into the Toyota? Here’s what we took, which will give some insight into Unk’s minimalist approach to astro-imaging.
Mount: As many of y’all know—from hearing me go on and on about it over the last couple of years—my long running love affair with fork mounts is over—for imaging, anyway. I find a German equatorial mount, a GEM, easier to manage for astrophotography: easier to balance, easier to align. It’s also more versatile, since I can slap on whichever OTA is called for on any given night. Yeah, I looked longingly at the AP900 and Mach1, the Losmandy Titan, and the CGE in descending order of painful expensiveness. At the low end, the CGE at 3000 dollars (or the very similar Losmandy G11) was still more than I could stomach, given that I might get out to do serious imaging three or four times a year on average at the moment. Long story short? I settled on the Orion (Synta) Atlas (EQ6). Certainly it is not an AP or even a Losmandy, but given the few times I’ve been able to use it over the last year, the Atlas has proven itself to be a capable imager, and it will be a long time before I outgrow it.
Camera: While I often use a wonderful SBIG ST2000, I’ve got hooked on the DSLR thing of late. I mean, what’s not to like? With a chip larger than all but the most expensive “real” CCD cameras, and very good lookin’ one-shot color, my Canon Rebel Xti (aka 400d) suits me to a tee. If nothin’ else, it is so film-SLR-like that, given my three decades of shooting with old-fashion SLRs, using it for astrophotography has been as easy as falling off the proverbial log. Only “problem”? These cameras’ APS size chips are covered by an IR block filter. That makes snaps of Miss Dorothy look good, but blocks the red light of nebulae. It is possible to have this filter removed, but I have not been moved to do so thus far. The bright nebulae I usually go after look right good in the Canon, IR block or no.
Guidescope: In these days of CCD guidecams, you really don’t need much of a guidescope. For starters, forget about needing one with a focal length close to that of the imaging scope. Silicon don’t care. I’ve used both a William Optics 66mm “SD” and a good, ol’ Short Tube 80 successfully. I’ve been using the 80 a bit more recently, since it seems to (maybe) show a few more guidestars in any given field than the 66, but the difference is minor.
Laptop: My laptop PC is several years old, but thanks to Miss Dorothy, who encouraged me to buy the fastest one I could find, this Toshiba 3.2 gig machine is still an outstanding performer. It is quite power hungry, but I have learned to deal with that. It is also as heavy as a ton of bricks, but that’s only a consideration when totin’ it through an airport.
Software: What do I need a consarned laptop for anyways? The beauty of DSLRs is that they can be used just like 35mm SLRs, right? No stinkin’ computer needed. Yes and no. As I pointed out in a recent edition of this very blog, a laptop just makes DSLRing easier, ‘specially when it comes to focusing. I don’t know about you, but I find it easier to focus a star on a bright laptop screen than in a dim and tiny DSLR viewfinder--or even with one of the “live” display screens more and more cameras are featuring. Which program do I use? Nebulosity. This was the first DSLR-centric one I tried when I got my Canon, and I have not felt the need to upgrade. It (now in Version 2) is inexpensive at 60 bucks, and will do ever’thing I—and even many advanced imagers--want done. Wut else? Naturally, if you’re gonna lowball it on the mount like I did, you are not gonna be making very long unguided exposures. I like to do 2 – 3 minute integrations, and so, need an autoguiding program. I have yet to find anything better than PHD Guiding. It is free, a big recommendation in my book, but, best of all, it really is “push here dummy.” Most of the time, I just hit the “go” button and it works.
Guide Camera: I hear good things about Orion’s inexpensive StarShoot autoguider, but I gotta say my Meade DSI (the original color version) still works fine after several years of use. No, it’s probably not the most sensitive guidecam out there, but, nevertheless, I have never found a field where it wouldn’t show at least one or two guide-worthy sparklers.
Battery: Combine a honkin’ big laptop with Meade’s surprisingly power hungry little DSI camera (it draws its current from the USB bus), and you can bet a laptop battery ain’t gonna keep things rolling for long. Even a jumpstart battery pack ain’t enough for me. What I use is a 75 amp hour trolling motor battery (maybe called a “deep cycle marine battery” in your neck of the woods). In the interest of preserving even this big battery, I run the computer off one of them little 12vdc laptop adapters. These DC – DC supplies are much easier on the battery than what I used to use to power the computer: the laptop's normal power supply plugged into a DC to AC “inverter.” I still use the inverter, however. Turned out the DSI draws enough current to make the laptop’s DC to DC supply trip offline. My solution at this time is to use an AC powered USB hub plugged into the inverter, which is, of course, connected to my battery. I know there are DC powered USB hubs out there, and I’ll run one of ‘em down one day, but this setup will go all night with the DSLR—and even the SBIG despite its electron-gobblin’ Peltier cooler.
Hooking it all together: Lizbeth and I packed this ton of astrojunk in the car and headed out to our Tanner-Williams, Alabama darksite. When unpacked, we had enough stuff on the field to make our end of it look like the headquarters of a South Seas cargo cult, and I admit I began feeling a bit overwhelmed. The last shot I took before this night was of M42 when it was on the Meridian, and I was having a hard time remembering what went where and where to start. Starting with the relatively friendly scope and mount allowed me to dispel the deer-in-the-headlights blues. By the way, as you can see in the image, the guidescope and the imaging scope are on a side by side mount (from ADM). Do I think this is better than piggybacking the guidescope on the mainscope? Not necessarily. A piggyback combo is maybe a little easier to balance. The side-by-side has the advantage, however of allowing me to swap scopes and guidescopes freely without having to acquire and keep up with multiple piggyback brackets and guidescope rings.
Hookup of all them computer widgets? I took the bit in my teeth and got to work. The guide camera goes in the guidescope via a prime focus adapter (you can’t reach focus if you just insert a guide camera into a refractor’s drawtube; they are designed to be used with diagonals and won’t provide a camera enough backfocus without a diagonal). The guidecam’s USB cable goes to the USB hub. Next up was the Canon DSLR. It requires two connections; one from its “remote” jack to Shoestring Astronomy’s DSUSB DSLR shutter-interface box. The Rebel also requires a connection from the USB port on the camera to the USB hub. This USB connection is for image download, while the shutter connection is for, yep, shutter control--and also enables things like ISO and exposure duration to be set from the PC. I understand the most recent Canon DSLRs don’t need this remote connection, with everything able to be done via the USB line.
One final cable is required, an ST4-style one for autoguiding. That goes between a Shoestring guide adapter on the laptop (I have the parallel port version, but a USB model is available) and the autoguider port on the Atlas. With all these cables running ever' which-way, take care to dress ‘em so they don’t get tangled on the tripod and won’t get tripped over (I’m notorious for that). USB “extension cords” are a lifesaver here and can be obtained in Wally World or your computer-junk retailer of choice.
As you might expect, by the time I finished with all this stuff it was getting dark enough to get polar aligned. What do I do in that regard? Y’all know I hate drift aligning. To avoid that mess, I rely on the Atlas’ polar alignment scope, which is generally more than good enough if I am careful. In my opinion, if you are autoguiding you really don’t need to drift no more. Yeah, I know the high resolution imagers will tell you that is no way to get the very smallest, tightest stars. Me? I am just happy if my stars are round, and and I haven’t had much trouble with that despite my aversion to watching a star drift in the crosshairs. Like I said, I try to do a good job with the polar scope.
I do that by first turning the RA axis until that little circle on the reticle where you put Polaris is straight down in the field of the polar scope. I adjust the mount in RA until Polaris moves straight up and down from reticle to the circle. That defines the “0 hour” position for the polar scope, and I then move the RA setting circle until it indicates 0h and lock it down. Next step is to figger out the current Polaris Hour Angle. You can do that with a PC program, or, if you have the Atlas, the SynScan HC will tell you the Hour Angle once you’ve inputted date, time, and position. I like to use a cool (and free) little program called Polarisfinder. Not only does it give the current Hour Angle, it displays a graphic of where the little circle should go in the field of the polar scope. On this evening, I, as usual, loosened up the RA and moved the scope until the RA circle indicated the correct hour angle as indicated in Polarisfinder. I then twiddled the mount’s altitude and azimuth adjusters to put Polaris smack in that circle. But something didn’t seem quite right.
Foul-up 1:
I went ahead and fired up the Atlas HC, even though it was not quite dark enough to do the go-to alignment yet. The hour angle the program had given me kinda-sorta sounded “funny.” Indeed, what the HC said was entirely different and more reasonable. What the? I checked Polarisfinder again, and it hit me: the program is of European origin and uses the European date format, dd/mm/yy instead of us Yankees’ (ulp) mm/dd/yy. That corrected, I readjusted the polar alignment. Lesson learned? If you are not completely familiar with a program, leave it at home.
If you’re using a Newtonian, it’s always wise to check the collimation of the scope prior to beginning an imaging run. Even if you use a mirror cell that locks down purty tight, check it. Be obsessive. Small collimation errors that aren’t apparent to the eye, even at higher magnifications, will be all too obvious in pictures.
Foul-up 2:
I pulled out my combo Cheshire/crosshair sight tube (from Celestron) and prepared to give Ol’ 37 a final tweak or three. Alas. I’d fooled around with polar alignment long enough that it was now dark and the Cheshire had become near about useless. Oh, I was able to get close by using a flashlight pointed down the tube, but it wasn’t easy, and my collimation is obviously off when you blow up last night’s pix. Moral of the story: collimate as soon as you hit the field. If you don’t want to do that, or tend to arrive onsite as dusk comes, buy and use a good laser collimator.
Next up was go-to alignment. I normally use the EQMOD ASCOM scope driver program instead of the hand control, which makes for easy and accurate go-to alignments. You simply click on three—or six, or however many you want--stars on the display of the planetarium (any ASCOM compliant planetarium) you use in conjunction with EQMOD, send the scope on go-tos to these stars, center ‘em, and tell EQMOD to use ‘em as the alignment stars. Looking at Cartes du Ciel’s screen makes it easy to figure out which stars are good picks. Just choose three that form a nice, big, triangle. The SynScan HC? You are presented with a seemingly patternless list of alignment star choices, and it’s difficult for me to decide which ones are best to use from this list of proper names (why in the hell can’t go-to scope makers identify alignment stars as, for example, “Beta Herculis” instead of “Kornephoros”?).
Foul-up 3:
Yeah, I thought running the mount with a hand control I’d used once previously, nearly a year ago, would be “simpler” than usin’ EQMOD. Not! Yes, the SynScan HC looks a lot like my NexStar HC, but it is a totally different beast. Trying to use the same button pushes as on the NS controller resulted in me locking the puppy up and shutting off tracking. I had to start the go-to align over, wasting more fleeting minutes. If you are not thoroughly versed in the use of a piece of equipment, save learning it for the backyard, not for a dark site during an imaging run.
With the mount more-or-less aligned, I was able to proceed to focusing the guide camera and the imaging camera. My usual procedure is to focus up on the final go-to alignment star, increasing exposure when that bright one is as small as I can get it so as to show up dim field stars. Nebulosity has an excellent fine focus tool that can be used on these dimmer (non-saturated) stars to obtain precise focus easily. If you are careful, anyhow.
Foul-up 4:
After wasting time redoing the polar alignment and the go-to alignment, I made a critical error: I got in a hurry. What I should have done was recheck focus once the scope landed on M13, my first target. A globular cluster is incredibly unforgiving of mis-focus, and it’s obvious in my images that the tiny stars that form this cluster could have been tighter. Be unrelenting about focus and never, ever, hurry. That’s a sure way to make the entire evening a waste of time. Luckily I was close enough to focus to make my final images acceptable--barely.
Alright, it was finally time for the pay-off. I centered M13 in the frame using Nebulosity’s “frame and focus mode” (it fires your DSLR’s shutter continuously until you tell it to stop). I then let her go: “Gimmee 20 three-minute frames.” The first one to pop onto the display looked good. Guiding was right on—always my chief concern. As a matter of fact, guiding was the only thing that really went well last night. PHD is just flat out amazing. When I arrived at M13, I clicked on a star on PHD’s display, one suitably near the glob, hit the “guide” button, and PHD calibrated and started guiding without complaint, keeping the little star dead-nuts-on for as long as I desired.
OK…first exposure was done. On to the next frame. When it appeared, frame 2 seemed a little odd. Consecutive “subs” of the same target always look a little different—seeing changes a bit and the stars sharpen or unsharpen; the field background density changes a little; etc. Strangely, though, the second frame looked flat-out identical to the first one. As did the third-un. It was not until the 15th frame, about an hour later, that one of my few remaining neuron’s fired: “Rod, you are not hearing the shutter fire.” The Rebel makes an easily audible “motor drive” sound when it exposes. I was not hearing that. A little experimentation revealed that sometimes the shutter would fire, sometimes—most times--it would not.
Foul-up 5:
Lizbeth and I spent at least a half hour diagnosing the problem. Turning the camera off and on. Rebooting the PC. Unplugging the camera’s USB cable and plugging it back in. Finally, I spied the little DSUSB shutter interface box. “Hmmm…the cord that goes to the remote plugs into a mini-jack on this box. I wonder if it’s
All over but the crying? Well, by 11:00 pm conditions had degraded to the point where it was obvious that Lizbeth and I might as well start packing up (our fellow club members had departed an hour previously to the tune of plenty of—OOOPS!—accidentally illuminated headlights and running lights). As we were proceeding to pack 10-pounds of stuff into the proverbial 5-pound bag, I felt a bit put out. 8-dadblasted hours in the damp cold and not a whole lot to show for it, prob’ly.
As always, though, things looked better this morning over a cup of coffee. One smart thing I’ve learned is NEVER EVER LOOK AT YOUR IMAGES AS SOON YOU GET HOME. It’s late, you’re tired, and have spent the better part of an hour, usually, unloading a ton of gear. Even if your name is “Jack Newton” your pix are gonna look just like hell. In the morning light, a waltz through the hard drive revealed that Lizbeth and I had brought home a few OK frames. Certainly nothing I would enter in a contest or even want to show my friends—you all, that is—but good enough to tell the tale on the 37-Year-Old Telescope. Verdict?
Brothers and sisters, you know I am not really a Newtonian kind of a dude, but I must admit the stars look very good out to nearly the field edge in the Rebel (love that name!) frames. With the simple addition of an inexpensive Baader coma corrector, I’m a-betting they would be darned near perfect. I don’t think I have to spend over a grand afterall (not to say I might not if the gear-fever strikes). There is something else going on too. I can tell you right now that I ain’t gonna be giving up my CATs for lion’s share of the imaging duties ‘round here, but Ol’ 37 does deliver one thing they never will. The ineffable feeling that comes of looking at astrophotos--no matter how humble and screwed-up they might be--that are the product of a piece of glass you sweated and dreamed over.
![]()
