Sunday, September 06, 2009
Trying to Take Pictures
 Today, there’s no shame in being an amateur astronomer who just looks, muchachos. The Dobsonian revolution of the 1980s saw to that. Amateurs “just looking” through large Dobs are doin’ some of the most amazing work in amateur astronomy. In the 1960s, it was different. Everybody—all the amateurs Little Rod knew, anyhow—at least aspired to astrophotography, whether they ever got around to taking photo one or not. For those of us who were hard-bitten by the bug, there eventually came a time when we announced to our buddies that we were Trying to Take Pictures. The response was invariably both interest and commiseration, since even getting a decent shot of the Lunar terminator was a pain with the gear and knowledge most of us had in the stone(d) age.
“Astrophotography;” the very word was chilling in the old days, and still is for beginners. There’s really not as much reason for that to be so now, however. Astrophotography, or, if’n you want me to be up-to-date, “imaging,” is not and never will be a breeze. It is, even with all the advances made over the last four decades, a difficult and aggravating pursuit. That given, though, it is now much easier to get pictures that will please (if not qualify for inclusion in the amateur astronomy magazines’ Gallery sections) than ever before. But first you have to get off the ground. I’ve talked around this subject before, but I don’t think we’ve ever discussed the simplest of simple first steps in deep sky imaging: star trails and piggybackin’. How do you get started doing that and put yourself on the long road to LRGBs of Stephan’s Quintet?
You get a book. I’m serious. Yeah, yeah, I know you hate to read manuals and borin’ stuff like that, and I know you are ready to get out and take pictures, but this is one time you will want some help. Even if your initial goals are humble, Michael Covington’s Astrophotography for the Amateur will make your entry into our sport smoother and your results better. This book, originally published in 1985, is still mostly concerned with film astrophotography. It has, however, been updated with mucho material on digital imaging techniques—CCD cameras, DSLRs, etc. I’d also say that for a beginner’s purposes, having a book that covers film imaging is maybe not such a bad thing. I used Michael’s book as my bible when I got serious about imaging for the second time in the late 1980s. I just wish I’d had it the first time around.
What most newbies want to know right off the bat is “What kind of camera do I buy”? But that’s sorta puttin’ the cart before the horse. What you should be axing (yourself) is “What kind of pictures do I want to take?” If the answer is “Moon and planets; high resolution images of the Moon and planets,” the path forks off. Your journey will be in the company of webcams and the new “super webcams” like the ones from Imaging Source and Lumenera. For today, though, I am assumin’ your answer is, “Portraits of deep sky objects, Uncle Rod.”
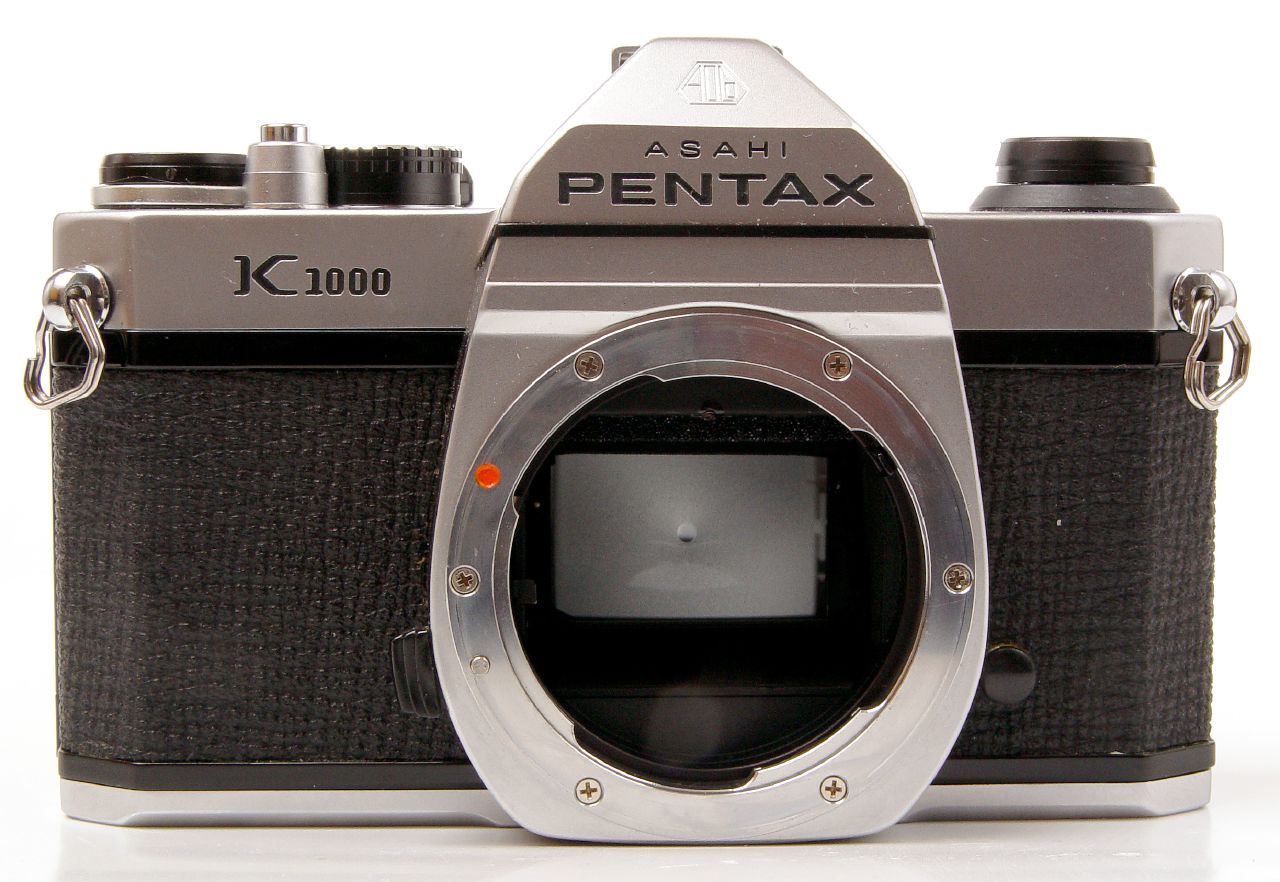
If that is your goal, I will say rat-cheer that it is a worthy one, if a difficult one to attain. Let’s begin gettin’ you on the strait and narrow. What kind of camera do you need? What kind of camera do you have? If you have a DSLR, a digital single lens reflex, of any kind, the answer is THAT’S IT. Yes, some DSLRs are better for astro-imaging than others, but any will do admirably for the first steps. If you don’t have a DSLR? Well I don’t, as some folks do, advise you to try a digital point ‘n shoot.
If that is all you have, give it a try, sure, but don’t expect too much beyond (noisy) star trail shots. The main problem with these cameras is their lenses, beginning with the fact that most cannot be removed from the camera body. That’s not a problem at first, but will be a huge one when you eventually move on to shooting through a telescope. And there are other deficiencies that make point ‘n shoots less than desirable for even the simple astrophotography we are contemplating. Typically, their lenses are “slow” with large f/ratios, and that means these cameras require much longer exposures to record sky objects than the average DSLR, which is limiting even for star trail pictures. The biggest problem, however, is that many do not have a manual/“B” mode, a setting that allows the shutter to be held open for long exposures.
So, what do you get if you don’t have a DSLR? You could run out and buy one. If you are OK with that, cool. I suggest Canon (my first choice) or Nikon, as these two brands are, in my opinion, best suited for astro-imaging. If you don’t think you want a DSLR, or don’t want to get one just yet? There’s the “real CCDs,” cameras designed solely for astro-use. Anything from an humble and inexpensive Meade DSI to a big honkin’ (and expensive) SBIG (or FLI or Apogee or whatever). But I council against that. Not only can they be expensive, they are not very easy to use for piggybacking/star-trailing, usually. Also, if you decide you don’t like astro-imaging after all, ‘bout all you can do with one is sell it on the dadgummed Astromart—at least with a DSLR you can take snapshots o’ your Aunt Lulu at Christmastime.
There are good reasons most astrophotographers have turned from film to silicon: it’s more sensitive, it’s easier to process, it delivers better results in compromised skies, and, most of all, maybe, there ain’t much film left that’s good for astronomy. The astrophotographer’s best friend, Kodak Tech Pan, is long gone. So are the color print films your Ol’ Uncle loved so much, Fuji’s Super G+ emulsions. But that don’t mean there ain’t no films at all that can be used on the sky. Kodak’s Royal Gold, for example, can do a relatively good job, especially for the beginner. And it also doesn’t mean film is a poor choice for all imagers. One thing’s sure when talking about the pluses and minuses of film astrophotography: the cost of cameras is a much less bitter pill to swallow.
Where do you get a used SLR? There’s always the New York City camera stores, most of which have used sections on their websites. I advise staying with Adorama and B&H Photo, since they have proven themselves reputable and prompt. There’s also eBay, but that can be a crapshoot. Possibly best? A local camera store. If you have one that caters to professional photographers, you may find they still sell used film SLRs. They may cost a little more there than on the ‘net, but you will at least be able to handle the camera of choice. Or you may actually pay less. A lot of these venues are closing-out their used film camera business, so you may get a great deal.
What else do you need once you’ve got a camera? You’ve probably heard what a money pit astrophotography is, and it can be, but not when you are gettin’ started in simple and easy fashion. To get off square one, you need a tripod (e’en a cheapo Focal from K-Mart might do), a remote (cable) release for the camera, and some film; that is it. Once you move up from star trails, you’ll also need a “piggyback” camera mount for your particular telescope, or the parts and pieces to build a tracking platform.
Ah, yes, star trails. This type of image has long been the startin’ place for buddin’ deep sky astrophotographers. These simple photos (like the one at the top) that record the passage of the stars over an hour or three, are not only attractive, even “artistic” lookin’, especially if you shoot in front of interesting foreground or background objects, maybe illuminating them with a red light, they get you used to handling a camera in the dark of night and give you some sense of your sky’s potential for astrophotography.
How do you take ‘em? Load your camera up with some medium/fast film (ISO 400 is nice), trot it and the tripod and the cable release outside, mount camera on tripod, set the shutter speed to B, attach the cable release, point the whole rig at Polaris, and focus. To do that, observe the appearance of bright stars (which are about all you will likely see through the viewfinder). Do NOT rely on the infinity mark. Open the lens’ iris (f/stop) to its maximum (lowest f/number). Then all you gotta do is open the shutter via the cable, lock that down, and head back inside to watch the 24-hour Hitler marathon on the cotton-pickin’ Military Channel (do they ever show anything else?) for an hour or two. After the time has elapsed, go back outside close the shutter, and you’re done. Well, almost. I’d take another shot or two with the lens stopped down one or two clicks (higher f/number). Often lenses will deliver best edge sharpness when stopped down a little bit.
Any gotchas? If you live where it is heavily light polluted, wait till you can get to your club dark site or some such to do your star trails. Even inexpensive SLR lenses are “high speed” as we reckon things in astrophotography. You won’t usually find a normal lens much slower than f/2. That means the sky will get bright in your pictures in a hurry. If your conditions are as bad as Chaos Manor South’s, your shots will look like images of the daytime sky once you go much over four or five minutes. Also, you’ll probably need to provide some dew protection for the lens. A lens hood might do. A cardboard dewshield you cobble together certainly will. A Kendrick heater strip for 2-inch eyepieces works real good.
The next step after you get tired of star trails? Assuming you do not fall prey to the siren song of the non-astrophotographer (“What doooo yoooou want to taaaake your own pictures fooooor? Yoooou can get all the pictures yoooou want off the Internets!"), you put the camera on a mount so it can track the stars. There are two ways to do that. First and maybe best is to place the camera on an equatorial mount. If you’ve got a scope on one, get a piggyback mount from your fave astro dealer. This bracket will screw onto your tube (the rear cell of the telescope in the case of SCTs) and allow your camera to ride, yes, “piggyback” and track the stars along with the scope. You will shoot through the camera lens, not through the telescope. You will also want a photo ball-head or similar to come between mount and camera to allow some flexibility in pointin’ the camera independently of the telescope/mount.
If you have any one of the countless permutations of that thriving species, the Chinese-made German Equatorial Mount, GEM, you may not even need a piggyback bracket. Many of ‘em have tube rings equipped with top mounted ¼-20tpi threaded bolts that are designed to allow you to attach a camera. You will still want a ball head, natch. What kind of GEM will work? If you are shooting with a normal lens, magnification is low and guiding tolerances large. You don’t even need a drive. If the mount has slow motion controls, just turn the RA slomo at close to the proper rate while monitoring a “guidestar” through the telescope. I’ve seen good shots done with unmotorized EQ-1 mounts, and it don’t get much cheaper nor simpler than that.
Needless to say, you should be at least roughly polar aligned if you want to keep the stars round. How rough is rough? For a 50 – 80mm lens on a film SLR or a 28 – 50 or so on a DSLR (smaller than 35mm film-sized chips yield more “magnification”), all you really need to do is point the polar axis of the mount at Polaris. How long can you expose with such a lazybones alignment? With a normal lens, the skyfog will get you before star trails do. 15-minutes easy.
But do you even need to polar align at all? How about piggybackin’ the camera on an alt-az driven SCT? That will work, sorta. Unfortunately, you will find that even with a short focal length lens, you may not be able to get 15 minutes of exposure. The gremlin responsible for that is field rotation. Wut’s they-at? Ever notice that when Orion rises he’s a-layin’ on his side, when he’s on the meridian he’s on his feet, and when he’s settin’ he winds up layin’ on t’other side? That’s field rotation. An equatorially aligned mount “follows” that, but an alt-az cannot. Result is trailed stars no matter how carefully the shot was guided.
How long can you expose before field rotation becomes a problem? Depends on the focal length of the lens and the position of the target in the sky (near the Celestial Equator is better). If you want to try this, do some experimentin’…won’t hurt my feelins, but I believe you are better off in the long run with an EQ setup, whether a GEM or a fork mount on a wedge. You will need that for sure when you bump up the focal length of the lens or start shootin’ through a telescope.
 |
| Unk's "LX-1." |
How do you make a barndoor? There were plans all over the web last time I checked, ranging from simple manually driven models like mine to those equipped with stepper motors and blessed with special mechanical features to improve tracking accuracy. If you can’t find plans for one, or don’t like the plans you find, shoot an email to rmollise@bellsouth.net and I’ll send you the plans for an LX2.
How about store-bought solutions? Mounts, not for telescopes, but just for cameras? Camera trackers. There are some, and some are danged nice, like the AstroTrac. These kinds of things have been produced on and off over the years by everybody from my Crazy Cousin Clem to Takahashi. One thing they have in common? They cost money. Sometimes a lotta money (the AstroTrac is close to 700 dollars without needed accessories). What else do they have in common? At shorter focal lengths, the images they produce really won’t be much—if any—better than what you get with a barndoor. When you get up in focal length, 300mm and above, mebbe, they can help, but once you start in on that, it’s better to think about a full-size GEM, I reckon. Remember, these days a complete Celestron CG5 with go-to sells for less than 600 dollars, and will be considerably more versatile than any tracking platform/camera mount, if not as portable.
 Once you’ve got something to put the scope on, what do you do with it? What do you shoot? That should be obvious, but if not, what you do is go where the sky’s riches are. The star fields of Cygnus, Orion’s belt, Sagittarius’ teapot and all the southern wonderlands (like the area of the dark Prancing Horse Nebula in the photo here). There’s plenty to snap at short focal lengths; you won’t exhaust what you can profitably shoot in a year—or two or even three.
Taking the pictures, especially if you are using a digital camera, is only half the battle. You’ve got to process them into something that pleases. Film? The best you can do unless you are setup to process and print film at home is try to find a place that does “One Hour,” but which is staffed by people who know at least a tiny bit about photography. If you can find such a place, tell the folks runnin’ the big machine what you photographed, and ask them not to print the sky as pitch black. Dark gray is more like it (that goes for you younguns doin’ digital too, dark gray, NOT black, reveals more details and looks much better).
The bad part? It’s hard to find many inexpensive labs like that anymore. Mostly, you’ll have to hand your roll of film over to the folks at Wal-Mart and hope for the best (shoot a couple of terrestrial shots before the astro-images, so the technician will get things lined up right). The good part? If you have a decent scanner, especially one that will do negatives, it don’t matter. You can scan-in your photos and process them digitally jus’ like them high-falutin’ CCD imagers do. That, in fact, is what I did with the Prancing Horse image above.
How about digital processing? How do you do it? What do you need? Obviously, you need an image processing software program. I don’t mean you have to spend a grand on Adobe Photoshop, neither. If you’ve got a digital camera, the image processing software that came with it may be all you need (I particularly like Canon’s Digital Photo Professional). If not, Adobe Photoshop Elements is almost as capable as her big sister and costs a damned sight less. I also like the venerable Paint Shop Pro (now owned by Corel). There’s good freeware, too; some folks swear by a program called Gimp (which I have not tried enough to comment on). DeepSky Stacker, also freeware, will not only allow you to stack multiple short exposures into a less noisy and better-looking final product, it also features some basic image processing tools.
“But how do you process the images that come out of a digital camera, Uncle Rod? How? Mine look just like hell!” That’s what you should expect of “raw” digital images, more or less. What is amazing is how much they improve after just a few minutes manipulation in the computer. Manipulate how? That’s far too deep a subject to take up here at the stone-cold end of the week’s blog. Suffice to say, most of it involves manipulating an image’s histogram. Adjusting the white and black “points” until you have somethin’ onscreen that will make you run grab your honey and drag him/her over to the PC while hollerin’ “LOOK WHAT I DID!” Actually, what you mostly need to do is some reading. A good place to start is with Michael Covington’s book and also his excellent (and free) webpages like this one.
What’s next? Where do you go after you’ve scanned the sky in wide-angle fashion? You pour on the focal length. Kick it up a notch to 300mm and above. Maybe with a long lens or, better, one of the ubiquitous 66mm or 80mm ED refractors the Chinese factories is spittin’ out with such abandon. Put that on yer GEM or piggyback it on your SCT, and you start gettin’ into the big boy and girl leagues. That’s also where it gets a little hairy. Things like autoguiding become desirable if not required. You begin to wonder whether you need a bigger mount (you’ll likely have put your barndoor out to pasture by now). One more click? You decide to shoot through the big SCT (or refractor or Newt) instead of on top of it.
Which can be crazy-tough, no doubt about that. After 40 plus years of trying, I still have plenty of failures, and so does every other astro-imager. If you have taken it slowly, though, mastering the simple techniques described here, you will at least find “advanced” prime focus imaging easier if never easy. You will understand the basic concepts and problems involved in getting properly exposed images filled with stars that don’t look like star trails unless you want them to. Just as before, set down and do some studyin’ first. A good place to start is with Jerry Lodriguss' webpages and his books. You might also want to begin reading Popular Photography as well as Astronomy.
Now, get out there and shoot. The summer Milky Way is still on display—in spades—and the winter one will be here afore you know it. I’d like to see your results, too. I really enjoy lookin’ at novice astrophotos. I find that much more interesting and stimulating, actually, than what I see in the back of Sky and Telescope and Astronomy, which is usually, “14 hours of exposure with a 16-inch Ritchey-Chrétien on an Astro-Physics 1200 GEM.” Sheesh. I mean, don’t get me wrong, that is cool and all, but I find more encouragement in the images done by people whose talents are a little closer to mine than they are to those of masters of our art like Jerry Lodriguss and Bob Gendler.
What’s been going on here at Chaos Manor South other than me musing about astro-imaging (if not actually getting’ out and doing any)? I’ve been going the other direction a little bit. I suppose it’s the coming of cool(er) weather and the incipient Fall Star Party Season, but lately I’ve been more interested in lookin’ at the deep sky through an eyepiece than on a dadgummed laptop screen. Look for a new series on deep sky observing to go along with my intermittent (very) “My Favorite Fuzzies” blogs. Maybe two series. What will they be like? Soon, all will be revealed, muchachos. Maybe even next week (or maybe the week after, given the current presence of the gosh-darned ol’ Moon).
What else? My wonderful wife, Miss Dorothy, and I are celebrating 15-years of wedded bliss this weekend. That celebration began yesterday with a day at the very first game of our university’s new football team. GO JAGS! The celebration shall continue with much scotch whiskey and jazz music.
Comments:
<< Home
After twelve years of dabbling in astrophotography, with both professional and amateur equipment, I can say with some authority that it can be a very challenging experience. I have found that generally the more you spend on high end equipment, the better results you get as the technology makes it easier. I have manually guided and autoguided, shot film and CCD, Webcam, digital camera, and DSI.
However, do not forget the simple pleasures of just using the Mark 1 eyeball. It is much less stressful and easier to use....
Post a Comment
However, do not forget the simple pleasures of just using the Mark 1 eyeball. It is much less stressful and easier to use....

<< Home
![]()
